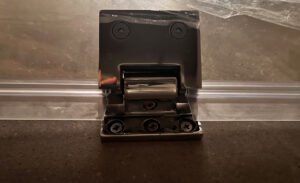
Even though removing a hinged shower door can appear difficult, it can be done easily with the correct equipment and methods. Knowing what to do is essential, whether you’re renovating your bathroom or just replacing an outdated shower door. An in-depth manual on the safe and efficient removal of a hinged shower door may be found in this article.
Tools and Preparation Required
To ensure a seamless operation, it is imperative to assemble all necessary instruments and prepare the area before commencing the removal process.
Equipment and Supplies
- Second person: Support is required to ensure security and stability.
- Towel or cloth: Keeps small bits contained and shields the shower base.
- Live ladder: Offers access to more advanced parts.
- Screwdriver: Required to remove pivot covers or hinges.
- Thin putty knife: Assists in releasing constrictive parts.
- Spray lubricant: Makes it easier to remove components and tight screws.
Steps in Preparation:
- To protect the shower’s surface and keep anything from falling down the drain, lay a rag or towel there.
- Adjust the door: With help keeping it steady, open the shower door halfway to gain easy access to the hinges.
Step-by-Step Procedure for Removal
Depending on the kind of hinge mechanism your shower door utilizes, the removal procedure may differ slightly. Instructions for several cases are provided below.
Regarding Hinged Framed Doors:
- Accessing the Hinges: To reach the hinges, take out any hardware from the frame. After removing the screws with a screwdriver, carefully cut the seal with a putty knife so as not to damage any surfaces.
- Removing the Door : With the help of your assistant, carefully remove the door from the frame once the hinges or pivot hardware are available.Removing the Door: With the help of your assistant, carefully remove the door from the frame once the hinges or pivot hardware are available.
In Regards to Pivot Hinged Doors:
- Removing the Pivot Cover: Use a screwdriver to locate and remove the pivot cover at the top.
- Accessing Pivot Pins: To release the pivot pins, take out extra screws if needed.
- Releasing the Door: To release the door from the bottom pivot, tilt it away from the frame by sliding the pivot post down and then lifting it while it is supported.
Regarding Doors with Direct Hinge Mounting:
- Starting from the Bottom: With the door supported by another person, start by unscrewing the bottom hinges and work your way upward.
- Detaching the Door : Gently remove the door from the frame by unscrewing all of the hinges, then place it on a cushioned area.
Changing Out the Door
Installing a new door will be the opposite of removing an old one, especially if it is the same make and model. Before tightening the screws, make sure the door is level and all of the hinge points are in alignment.
For Various Models and Makes:
- Attach Hinges to the Door First: If the replacement door is a different model, align and mount it to the wall or frame points after attaching the hinges to the door while it is off-frame.
Final Thoughts
When planning ahead, using the appropriate equipment, and being cautious, removing a hinged shower door is a process that can be completed effectively. You can make sure the door is removed safely by following these instructions, which will free up space for a new installation or any essential bathroom improvements or repairs. Recall that using an additional pair of hands not only facilitates the process but also increases safety.
If you have any questions, you can try to contact our experts.


